Travel Expense
Why should I use this form?
Use this form to record expenses, which were incurred during a Travel. This can be done against an approved travel request or for an independent request.
Note: Special approvals can be set for:
· Project – to set project based approval
· Expense Special Approval – to set approval, if the expense amount exceeds the expense limit (category-wise).
· Total Expense Amount – to set approval, if the total expense amount exceeds the expense limit (sum of all categories)
What are the Pre-requisites?
N/A
Who can access this form?
This form shall be visible to all employees to whom the visibility is given in Product Setup ® Module Role Mapping/Module Administration.
How to navigate to this form?
Point to Self and select Travel Expense under Travel Management.
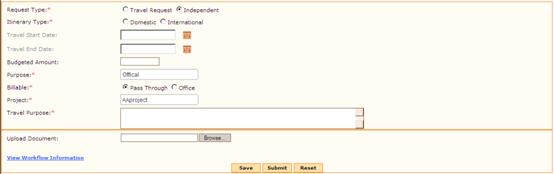
1. Select Request Type
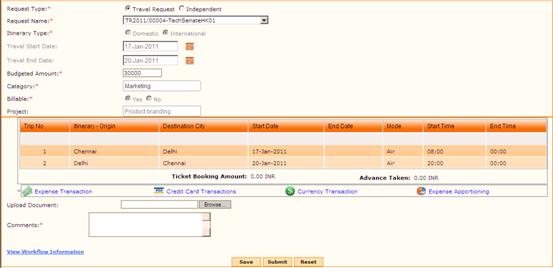
· If the Request Type is 'Travel Request', then all the approved Travel Requests are shown in the 'Request Name' drop down field.

· On selecting a Travel Request, details such as Itinerary Type, Travel Start Date, Travel End Date, Budgeted Amount, etc., are populated in the form.
· If the Request Type is 'Independent', then you will have to provide the travel details.
2. Select Itinerary Type. On selecting this option, Itinerary Details popup window appears, as shown here:
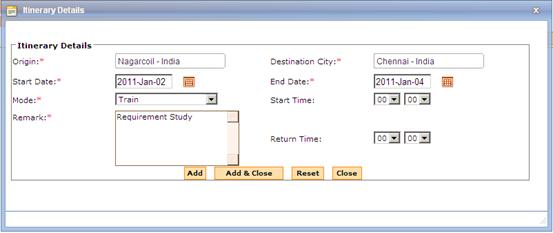
Provide itinerary details as required.
Click [Add & Close] to save the itinerary details and close the popup window.
Itinerary Details are added in the Travel Expense form, as shown here:
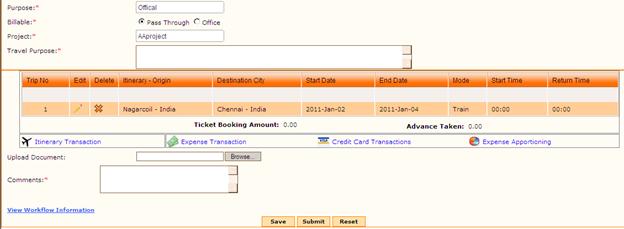
The tour dates are pre-populated from the itinerary earlier start date and the latest end date.
3. Enter Budgeted Amount for the Travel.
4. Choose Purpose of travel
5. Choose whether the travel is billable to the client or not.
Click the ‘Itinerary Transaction’ link to edit the itinerary details.
Expense Transaction
Click this link to provide expense transaction details. On clicking this link, the Expense Transaction popup appears, as shown:
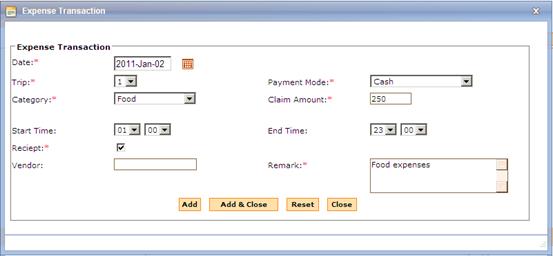
1. Date – Select the date when the expense has been incurred.
2. Trip indicates the itinerary number. In which itinerary the expense has been incurred.
3. Category – choose the category of expense
4. Payment Mode – Choose the mode of payment of the expense
· Booked by Company – company has already booked for the expense.
· Corporate Credit Card – paid through Corporate Credit Card.
· Cash – Paid by the employee.
5. Enter Claim Amount
6. Select the Receipt check box, if receipt is available for the expense.
7. Enter Vendor Name and Remarks
8. Click [Add & Close] to save the expense details and close the popup window.
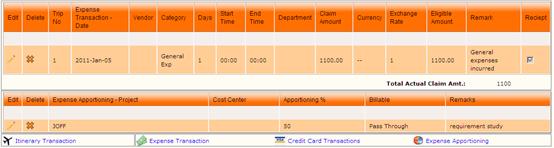
Expense Details are added in the Travel Expense form, as shown here:
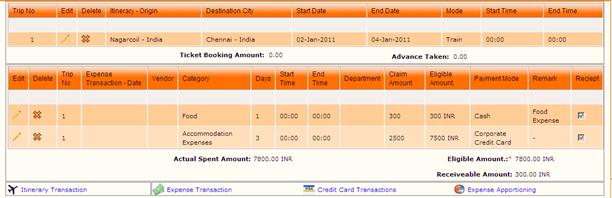
· Actual Spent Amount – Shows the sum of Claim Amount
· Eligible Amount – Shows the sum of Eligible Amount
· Receivable Amount – Shows the sum of amount with payment mode as ‘Cash’.
Click ![]() to
edit a record. Click
to
edit a record. Click ![]() to delete a
record.
to delete a
record.
To add more expense transaction, click the link ‘Expense Transaction’.
Credit Card Transactions
Click this link to provide Corporate Credit Card transaction details.
Note: Display of this link is configurable using the ‘WALLET’ parameter in Configuration Editor.
On clicking this link, the Credit Card Transaction popup appears, as shown:
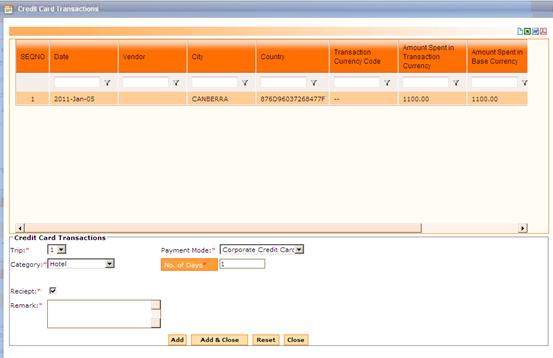
Grid in this form shows the credit card transaction details as uploaded using Data upload (‘TE_Credit_UPD.xls’).
Choose a record from the grid and provide necessary details in the ‘Credit Card Transactions’ section in the bottom section.
Click [Add & Close] to save the details and close the popup window.
Click [Reset] to refresh the form.
Expense Apportioning
Click this link to apportion expenses amongst projects/cost centers. On clicking this link, the Expense Apportioning popup appears, as shown:
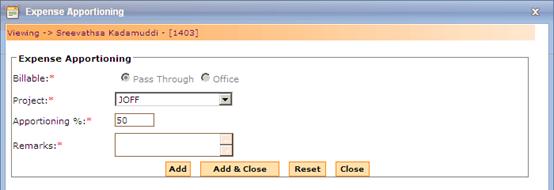
· Billable option is defaulted to Pass Through or Office, based on the selection made during Travel Request. If it is selected as ‘Pass Through’, then the expenses have to be apportioned amongst projects. If it is selected as ‘Office’, then the expenses have to be apportioned amongst cost centers.
· Select Project/Cost Center.
· Enter Apportioning percentage for the selected Project/Cost Center.
· Enter Remarks.
· Click [Add] to save the details and add another record.
· Click [Add & Close] to save the details and close the popup window.
The Credit Card Transaction details and Expense Apportioning details are shown in the Travel Expense form, as given below:
9. Click [Browse..] to upload any supporting document.
10. Enter Comments.
11. Click [Save] to save the details. Saved record can be viewed and edited later, and submitted for approval.
12. Click [Submit] to submit the form for approval.
13. Click [Reset] to refresh the form.