
Formula Manager
Why should I use this form?
Use this form to update/edit the claims that has been created.
This form is also used to manage formula, masters and compute expressions which will be used in the claims.
What are the Pre-requisites?
N/A
Who can access this form?
This form shall be visible to all employees to whom the visibility is given in Product Setup -> Module Role Mapping/Module Administration.
How to navigate to this form?
Point to Finance Task menu, select Formula Manager under CRS.
All the existing Claims are shown in the grid. Click a Claim to modify/enter formula/rules. If the selected Claim has validation as ‘Master’ or ‘Claims’, then this form shows two sections for defining master values and for entering claim formula.
Master Definition
The Master Definition section appears in the form if the claim has validation type as ‘Master’.

Click the ellipse button to enter values for the master. The Master Definition form will be displayed as given below:
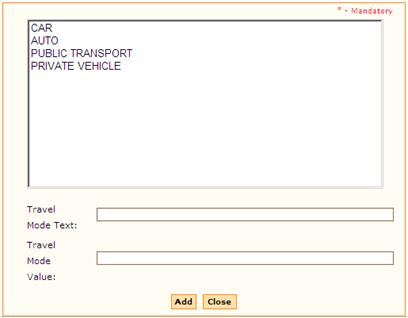
· Enter Travel Mode Text and Value.
· Click [Add] to add more master data.
· Clicking [Close] will close the form.
This would mean that when the claim form is used, the values for this column will need to be picked only from this column.
Claims Definition
The Claims Definition section appears in the form if the claim has validation type as ‘Claims’.

The Claim Name will be displayed by default. (Value entered in ‘Details’ column of the Part Details section will be displayed as Claim Name.)
Click on the Formula Code field. The formula composer form will be displayed as given below:
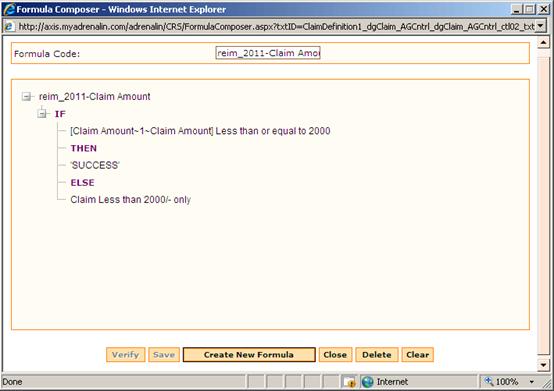
Formula Code appears by default. It is also possible to edit it if required.
To enter a formula,
1. Right-click the ‘If’. A popup menu appears, as shown:
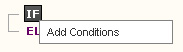
2. Click Add Conditions. The Formula Editor appears, as shown:
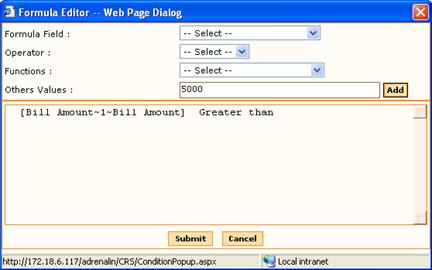
3. Select the Formula Field from the drop down. This field shows the list of fields whose type is ‘Amount’.
4. Select the Operator from the drop down field. This field shows the list of logical operators.
5. Select the Function from the drop down field.
Whenever the selections are made, the formula gets updated in the formula section.
If the formula is based on other values, enter the value in Other Values field and click [Add]. This will be updated in the formula section.
6. Click [Submit] to save the formula and close the form. Now the entered formula appears in the Formula Composer form, as shown:
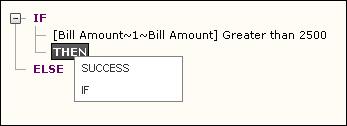
When one condition is added, it is possible to add a new condition, or display success message.
7. Right-click the ‘Then’. A popup menu appears with ‘Success’ and ‘If’ options. Refer the above image.
8. Clicking ‘If’ allows adding more conditions to the formula.
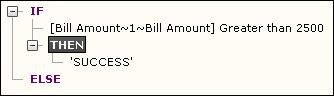
9. Clicking ‘Success’ displays success message. Please refer the image below:
In the ‘Else’ part, it is possible to add Validation message or another ‘If’ condition.
10. Right-click the ‘Else’.
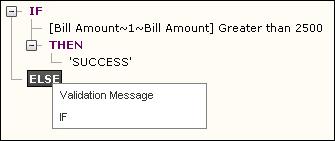
Click Validation Message, to provide Validation message. A popup window appears, allowing entering the validation message.

Enter the Validation message and click [OK].
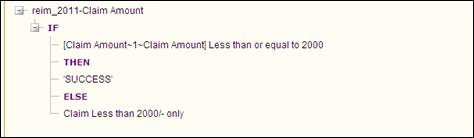
Now the full formula is shown as below:
The entered formula can be verified by executing the same. It returns a value after execution. Click the [Verify] button to verify the formula. On successful verification, system shows appropriate message.
Click [Submit] to save the entered Formula.
Clicking [Reset] will refresh the form.
Compute Rules
The Claims Definition section appears in the form if the claim has validation type as ‘Computed’.

The Claim Name will be displayed by default. (Value entered in ‘Details’ column of the Part Details section will be displayed as Compute Column Name)
Click the ellipse button to add/edit computation rule.
To create a new formula, click [New Expression].
· Select required formula from the Formula Field drop down field.
Selected formula appears in the formula area.
· Select required Operator.

Selected formula appears in the formula area.
· Similarly add required formula
· Click [Verify] to verify the formula set.
· Click [Reset] to refresh the form.
· Click [Save] to save the formula and close the popup window.
· Click [Cancel] to close the popup window without saving the formula.