Data Upload
Data upload is useful to upload Master data from Excel sheets to the respective tables/databases. This magic wand will be very helpful when there is a need to upload bulk data where individual data input consumes time.
The following are the validation/limitation that can be carried out by this upload.
1. If any master data is referred in excel sheet, the corresponding master data should be available in the Master table in Adrenalin Database. For example, for updating Employee Basic information, if employee's designation is being uploaded, the respective designation should be available in the Designation Master in Adrenalin database.
2. Data Length - the data size of the excel sheet column should be less than or equal to the size of the database table field length, for example, if the field size of a database table is 20 and if the column size of excel that needs to upload is 50, system will display error message during upload.(In the template itself max field size and data type and mandatory attributes are mentioned)
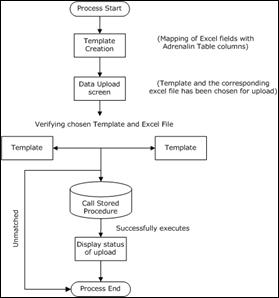
Process Flow
Excel file required for a data upload can be generated using the Generate Excel button.
How to get Excel file?
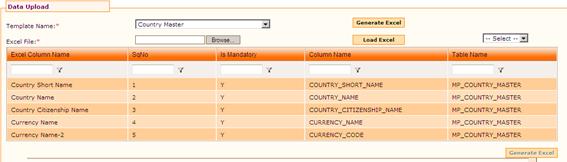
· Select the required Template from Template Name drop down field. On selecting the Template Name, fields available in the Excel file and their corresponding column name and Table name are populated in the form. Please refer the screenshot below:
· Click [Generate Excel]. On clicking this button, the File Save as dialog box appears, allowing you to open/save the excel file.
· Click [Open] to open the Excel file. Sample

· First Row – column number
· Second row – shows the maximum width of the column and also the type of input required.
· AN – Alpha Numeric
· N – Numeric
· A - Alphabets
· Third row – shows short description of the column
· Fourth row – shows the column heading
You can enter details in the excel file from 5th row onwards.
Note: Please delete first three rows before you upload this excel file.
Save the Excel file.
In the Data Upload form, select the excel file by clicking the [Browse…] button.
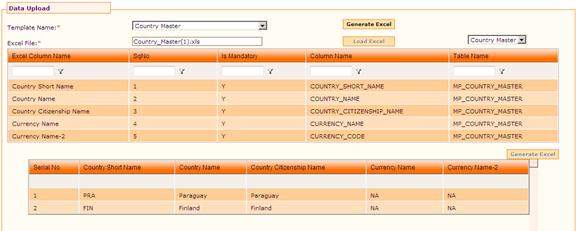
Click [Load Excel]. On clicking this button, sheets in the selected Excel file will be available in the drop down, as shown in the below screenshot.

Select the sheet in which data has been entered. On selecting the sheet, data available in the selected sheet is shown in the form, as shown below:

Click [Verify]. On clicking this button, records in the excel file are verified and status is shown in the form.

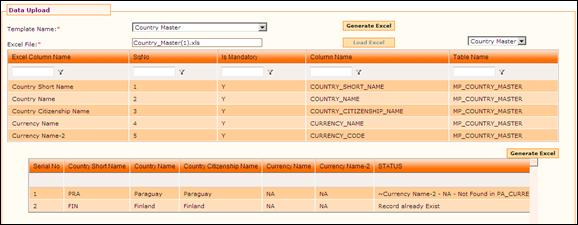
If the data provided for verification is accurate, then the status will show as “success”. If it is unsuccessful, the status column will display the error message against each record as displayed in the above screenshot. You can open the excel file and make necessary changes and upload it again.
If updated file needs to be uploaded, click [Reset] to do the upload process again.
The Upload button will be enabled only when status of all the records are shown as ‘Success’
Click [Upload] to upload the selected excel file.